Renaming country codes in WooCommerce is a simple yet effective way to enhance the user experience of your store. WooCommerce uses default country names, but depending on your target audience or regional preferences, you might want to make these names more relevant or concise. By modifying these country names, you can create a more localized and intuitive shopping experience for your customers, making your store feel more aligned with their expectations.
The process of renaming country codes is straightforward and doesn’t require advanced technical skills. All you need is to add a small snippet of code to your theme’s functions.php file. With just a few tweaks, you can easily customize country names to better suit your audience. This method allows you to have full control over how countries are displayed in your WooCommerce store, making the shopping process smoother for your customers.
Step-By-Step Guide to Renaming Country Codes In WooCommerce
What is Country Code in Woocommerce
In WooCommerce, a country code is a two-letter abbreviation that represents a specific country. These codes are based on the ISO 3166 standard (more info can be found here) and are used to identify countries in various WooCommerce functions, such as shipping, taxes, and customer addresses.
Key points about WooCommerce country codes:
- Format: Country codes in WooCommerce are always two letters, for example:
- AF for Afghanistan
- AX for Åland Islands
- AL for Albania
- Usage: These codes are used in various WooCommerce functions, including:
- Setting up shipping zones and rates
- Configuring tax rates for different countries
- Customizing checkout fields
- Filtering orders by country
- Retrieval: You can access country codes in WooCommerce using the following methods:
- For an order: $order->get_shipping_country()
- For all countries: WC()->countries->get_countries()
- Customization: Developers can use country codes to customize WooCommerce functionality, such as:
- Adding country codes to order numbers: $country_code. ‘-‘. $order_id
- Prefixing phone numbers with country calling codes
- Importance: Understanding and correctly using country codes is crucial for:
- Ensuring accurate shipping calculations
- Applying correct tax rates
- Providing a smooth checkout experience for international customers
By using these standardized country codes , WooCommerce ensures consistency and accuracy in handling international orders and customer data across its platform.
Step-by-Step Process to Rename Country Codes in WooCommerce
Before we get started, it’s important to understand that modifying the functions.php file can directly affect your theme’s functionality. Be sure to back up your site before proceeding to avoid any accidental changes that could impact your store. The functions.php file is a powerful tool that allows you to add custom code to your site, so it’s crucial to handle it carefully. Once you’re ready, follow the steps below to easily access and modify this file.
Step 1: Open the functions.php File
The first step is to locate and open the functions.php file of your active theme. This is where you’ll add the code snippet to rename country codes in WooCommerce.
Log into your WordPress Dashboard.
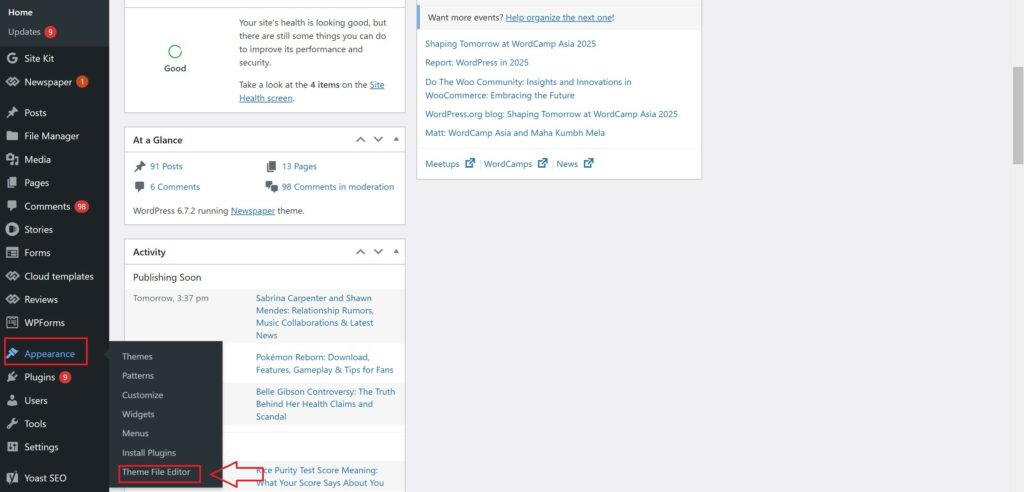
After logging into your WordPress admin, go to the sidebar and click on Appearance > Theme Editor. This will bring up the theme files for your active WordPress theme.
Locate the functions.php file.
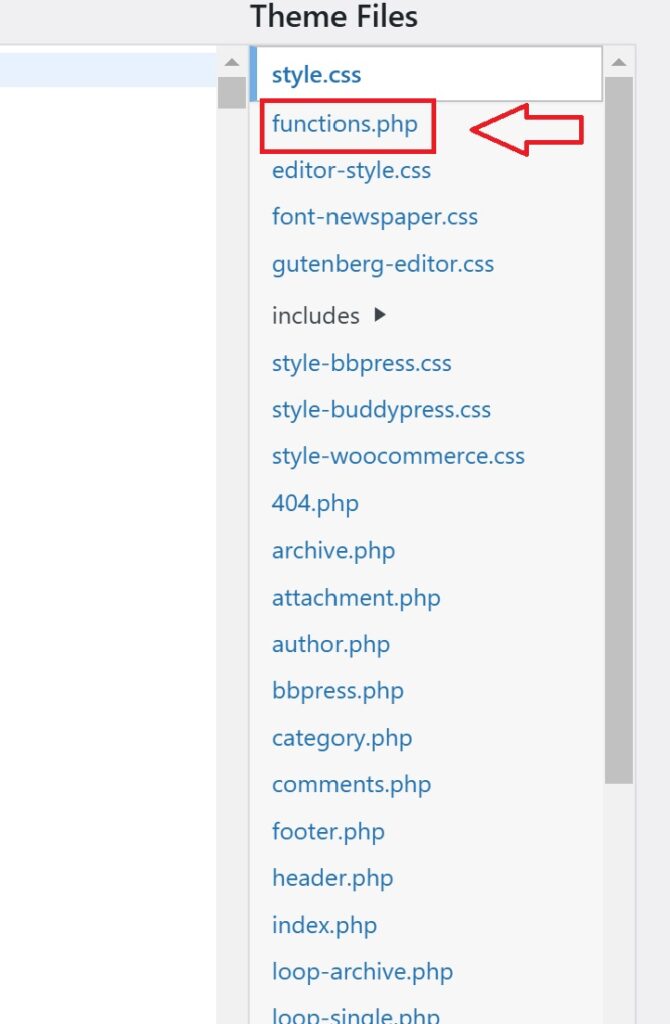
On the right-hand side of the Theme Editor window, you’ll see a list of template files under Theme Files. Scroll through this list and locate functions.php, which is typically labeled as Theme Functions.
Open the functions.php file.
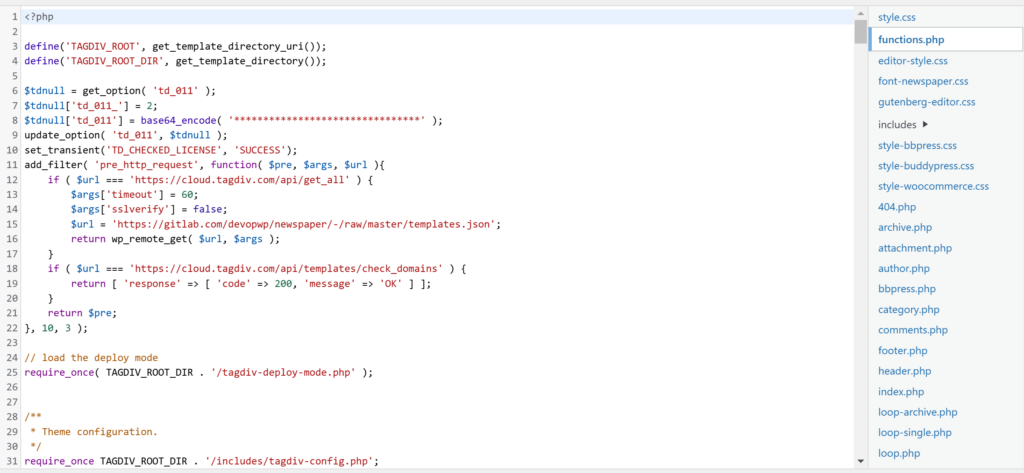
Click on functions.php to open it in the Theme Editor. This file contains the custom functions for your WordPress theme, where you will add the code snippet.
Step 2: Add the Code Snippet
Now that you’ve opened the functions.php file, it’s time to add the code that will rename a country code in WooCommerce. Follow these steps:
Copy the Code Snippet Below:
php
CopyEdit
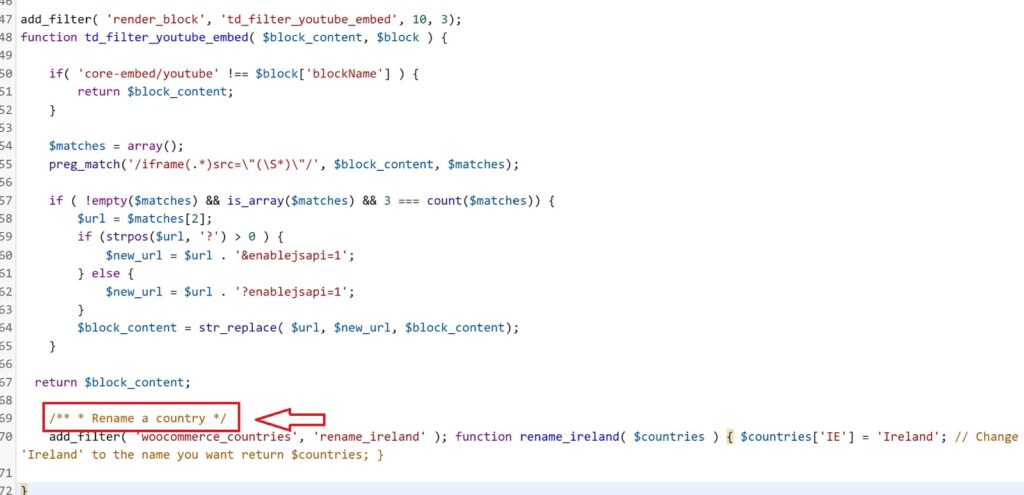
/** * Rename a country */ add_filter( ‘woocommerce_countries’, ‘rename_ireland’ ); function rename_ireland( $countries ) { $countries[‘IE’] = ‘Ireland’; // Change ‘Ireland’ to the name you want return $countries; }
Paste the Code:

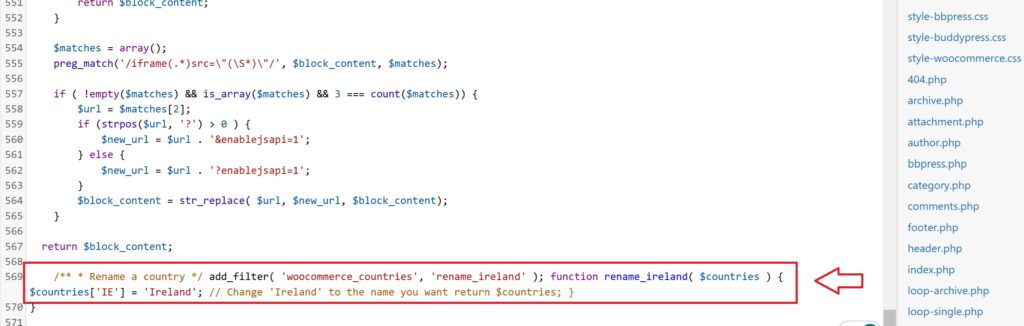
Scroll down to the bottom of the functions.php file and paste the above code snippet just before the closing PHP tag (if there is one). This ensures that the snippet is added at the end of the file.
Step 3: Explanation of the Code
If you’re not familiar with PHP or WordPress, the code may look a bit complex at first. However, let’s break it down step by step so you can understand how it works.
PHP Comments
The first lines are comments. These are not executed but simply provide information to the person reading the code. In this case, they explain that this block of code is used to rename a country.
Binding a Custom Function to the WooCommerce Filter :

The line uses the add_filter() function to bind a new custom function, rename_ireland(), to the woocommerce_countries filter hook. This hook is responsible for altering country data in WooCommerce.
Renaming the Country :-
In the custom function rename_ireland(), the country code IE (which represents Ireland in ISO 3166-1) is renamed. The countries[‘IE’] = ‘Ireland’; line is where the country name is modified. You can change the country code and name to anything you’d like, such as renaming the United States or another country in your store.
Step 4: Customizing the Code for Other Countries
To rename a country other than Ireland, you’ll need to make a few small changes to the code:
- Change the Country Code: The country code is a two-letter abbreviation used by WooCommerce to identify the country. For example, the country code for the United States is US, for Canada, it’s CA, and for the UK, it’s GB. You can replace ‘IE’ with the code of any other country you want to rename.
- Rename the Country: The name after the equal sign is what will display on your website. For instance, if you’re renaming “United States” to “USA,” you would change this line to:
php
CopyEdit
$countries[‘US’] = ‘USA’;
- Custom Function Name:
It’s always a good idea to give the custom function a name that helps you remember its purpose. For example, if you’re renaming the United States, you could name the function rename_us or rename_united_states.
Here’s how the code would look for renaming the United States:
php
CopyEdit
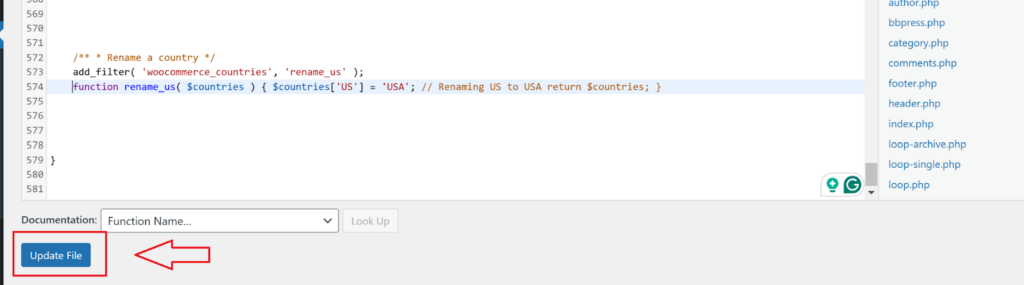
/** * Rename a country */ add_filter( ‘woocommerce_countries’, ‘rename_us’ ); function rename_us( $countries ) { $countries[‘US’] = ‘USA’; // Renaming US to USA return $countries; }
Be sure to change the function name in both the add_filter line and the function definition, or it won’t work correctly.
Step 5: Save and Close the functions.php File
Once you’ve added the code snippet and made any necessary modifications, it’s time to save your changes:
- Save the File: After you’ve added the code, scroll down and click the Update File button to save your changes.
- Close the File: After saving the file, you can exit the Theme Editor. Your changes will be live on your website!
Step 6: Verify the Changes
Once the changes are saved, it’s important to verify that the country name has been updated correctly on your WooCommerce store:
- Visit the Checkout Page:
Go to your store’s checkout page and see if the country name has changed in the country selection dropdown. - Test the Functionality:
Add a product to the cart and proceed to the checkout process. Ensure that the renamed country appears in the list and that it is functioning as expected (i.e., shipping rates and taxes should still apply correctly).
In this way, you can change and Rename Country Codes in WooCommerce.If you’re looking to dive deeper into coding and PHP, Agile Parrot offers expert insights into agile methodologies, coding practices, and product management to help you enhance your development process.
Advanced WooCommerce Customizations: Enhance User Experience with Aelia Plugins
Renaming country codes in WooCommerce is an easy task, but creating a fully localized shopping experience can involve more complex customizations. If you’re looking to manage product prices, visibility, or availability based on location, Aelia’s range of plugins offers powerful solutions.
For instance, the Aelia Currency Switcher for WooCommerce lets you display prices in multiple currencies, improving your store’s accessibility to international customers. The Aelia Tax Display by Country for WooCommerce automatically adjusts tax displays based on the customer’s location. Meanwhile, the Aelia Blacklister for WooCommerce can help prevent fraudulent orders by allowing you to apply custom rules at checkout.
For businesses that need more advanced location-based customizations, consider Aelia’s Prices by Country for WooCommerce. It enables you to set different prices and restrict product availability by country, leveraging geolocation to automate the process. These plugins give you greater flexibility in managing your WooCommerce store globally, ensuring a tailored shopping experience for every customer.
Want to learn more or need help with advanced WooCommerce customizations? Visit Aelia Offical website.