Running a WooCommerce store is responsible for protecting your business and customers from a range of potential threats. From fraudulent transactions to spammers and bots, malicious entities constantly target online stores. To ensure your store stays secure, leveraging the right security tools is crucial. One such tool is the Aelia Blacklister for WooCommerce plugin.
This plugin is specifically designed to help store owners blacklist malicious users, IP addresses, and other unwanted traffic, effectively preventing fraudulent activity and securing your WooCommerce store. Alongside security enhancements, optimizing other aspects of your store, like renaming country codes in WooCommerce for a better user experience, can further streamline your customers’ journey and boost overall satisfaction. In this article, we’ll dive into how the Aelia Blacklister plugin works and how to leverage it to safeguard your WooCommerce store from online threats.
What is the Aelia Blacklister for WooCommerce Plugin?
The Aelia Blacklister for WooCommerce is a powerful plugin designed to block users or IP addresses from accessing your WooCommerce store. It offers a simple yet effective solution for preventing fraudulent orders, spam sign-ups, brute-force attacks, and other forms of malicious activity.
With the plugin, you can blacklist specific users or IPs, preventing them from making purchases or accessing sensitive areas of your website, such as the checkout or registration pages. The plugin can also be customized to automatically block certain types of traffic based on predefined rules, providing you with an additional layer of security.
Why Should You Use the Aelia Blacklister Plugin?
The Aelia Blacklister plugin is an essential tool for WooCommerce store owners for several reasons:
- Prevent Fraudulent Orders: Fraudsters often attempt to make illegal purchases using stolen credit cards. The Aelia Blacklister plugin can block the IP addresses or email addresses associated with these fraudulent orders, preventing further attempts.
- Block Bots and Spammers: Bots can flood your website with spammy content, fake registrations, or unwanted comments. This can skew your site’s analytics and waste your resources. By blacklisting the IPs of bots and spammers, you reduce the risk of them overwhelming your site.
- Mitigate Brute-Force Attacks: Brute-force attacks, where hackers try multiple password combinations to gain access to your site, are common. The Aelia Blacklister can help you identify and block IP addresses involved in such attacks.
- Increase Overall Store Security: Blacklisting specific users or IP addresses who are flagged as malicious adds layer of security to your WooCommerce store, reducing the potential for data breaches or unauthorized access.
Implementing Blacklister In WooCommerce
Implementing a WooCommerce blacklist enhances your store’s security by preventing unwanted transactions. Aelia utilise various tools and methods to effectively manage and enforce blacklisting rules.
Aelia Blacklister for WooCommerce
Aelia Blacklister for WooCommerce enables a comprehensive configuration of rules to block orders from specific users. The WooCommerce blacklist can filter malicious users based on:
- Name and Surname
- Address: Street, postcode, city, province/state, country
- Email Address
- Phone Number
- IP Address
How to Set Up Aelia Blacklister for WooCommerce
Setting up Aelia Blacklister is a straightforward process, allowing store owners with minimal technical knowledge to enhance security by blocking fraudulent customers.
Step 1: Install the Aelia Blacklister Plugin
This step involves downloading, uploading, and installing the Aelia Blacklister plugin into your WooCommerce store. Let’s break it down:
Part 1: Download the Plugin
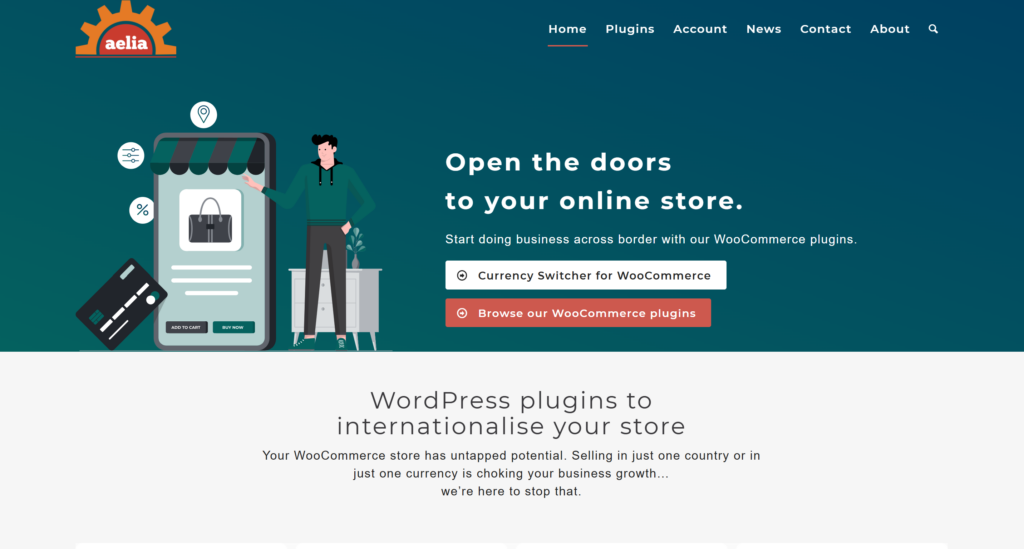
Visit the Aelia Website:
To begin, visit the official Aelia website. This is the safest way to get the latest and most reliable version of the plugin.
Purchase or Get the Plugin:
If the plugin isn’t free, make sure you have completed the purchase before proceeding. After the payment process, you’ll be able to download the plugin ZIP file to your computer.
Download the ZIP File:
Once you have access, click on the Download button. A ZIP file containing all the plugin’s files will be saved to your computer.
Note: The ZIP file is a compressed archive containing all necessary files to install the plugin.
Part 2: Upload the Plugin to Your WordPress Site
Log in to Your WordPress Admin Dashboard:
Start by logging into the Admin Dashboard of your WordPress website.
Navigate to Plugins:
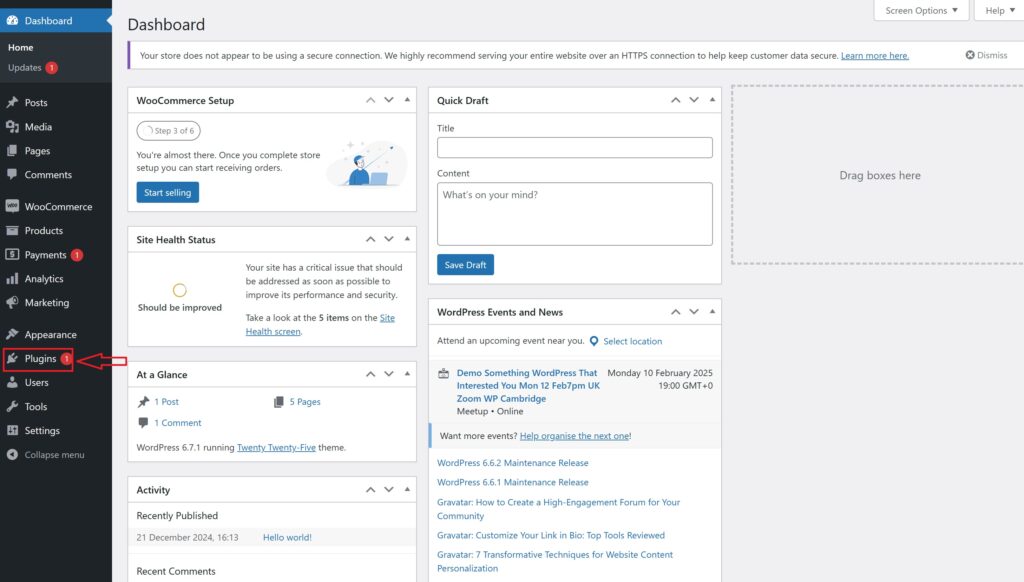
In the left-hand menu, hover over Plugins, and then click on Add New. This will open the page where you can search for and upload plugins.
Click on Upload Plugin:

On the Add Plugins page, at the top of the screen, you’ll see an option labeled Upload Plugin. Click on this button to proceed with the manual upload process.
Select the ZIP File:
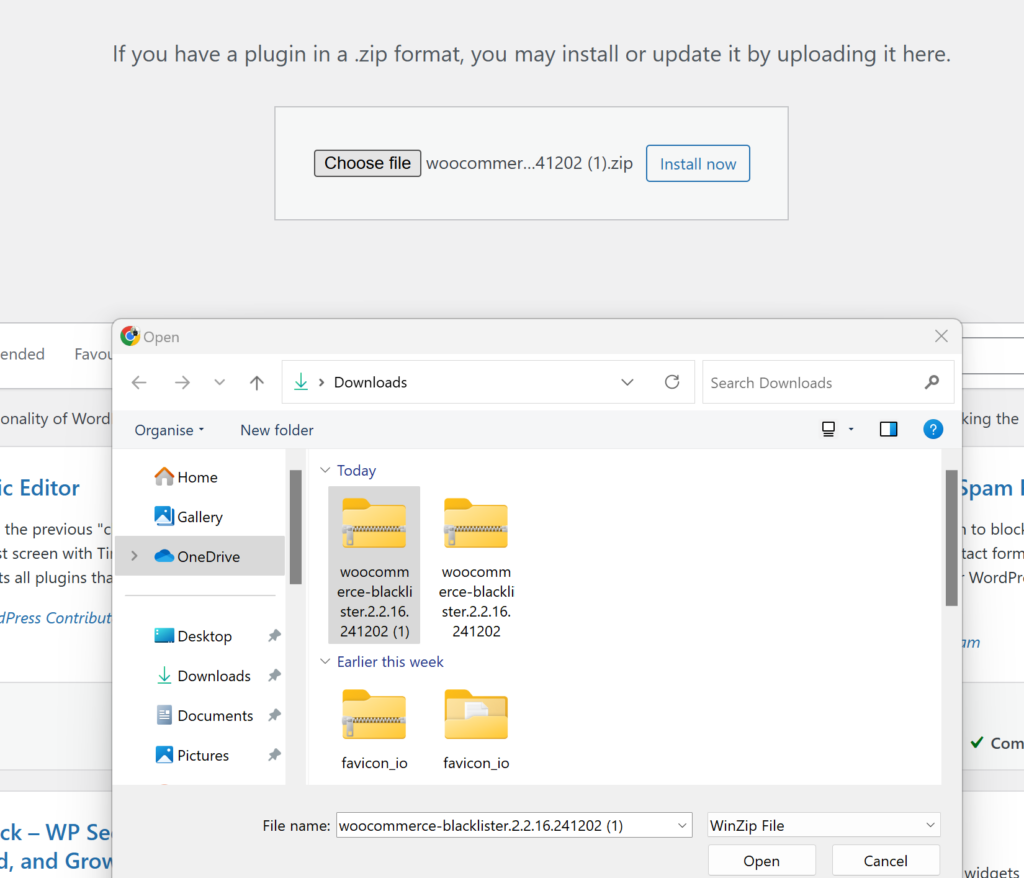
After clicking Upload Plugin, you’ll see a Choose File button. Click this button, and a file dialog will open. Find and select the Aelia Blacklister ZIP file you downloaded earlier.
Install the Plugin:
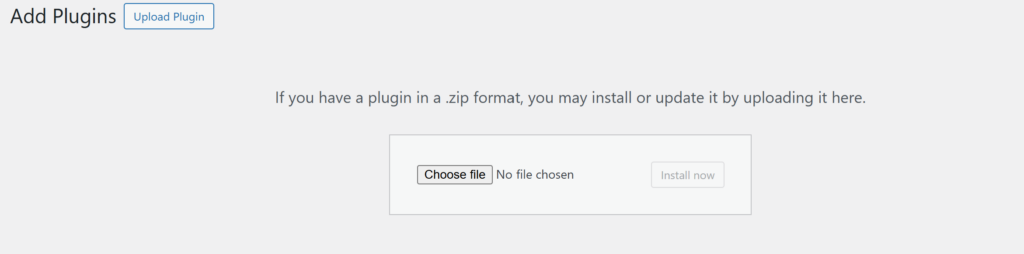
After selecting the file, click Install Now. WordPress will now upload the plugin file to your website.
Part 3: Install and Activate the Plugin
Wait for the Installation to Complete:
WordPress will begin installing the plugin. This may take a few moments, depending on the size of the plugin and the speed of your connection. Once installation is complete, you’ll see a success message.
Activate the Plugin:
After the installation, you’ll be given the option to Activate the plugin. Click on Activate to enable the Aelia Blacklister plugin on your WooCommerce store.
Confirm Plugin Activation:
Once activated, you will be redirected to the Plugins page where you should now see the Aelia Blacklister plugin listed among your active plugins.
You should also notice a new menu item or a settings option for Aelia Blacklister under the WooCommerce settings menu, indicating that the plugin is successfully installed and active.
Step 2: Set Up Blocking Rules in Aelia Blacklister
Once you’ve installed and activated the Aelia Blacklister plugin, it’s time to configure the rules to prevent fraudulent activities.
1. Block by Name and Surname
How to Block:
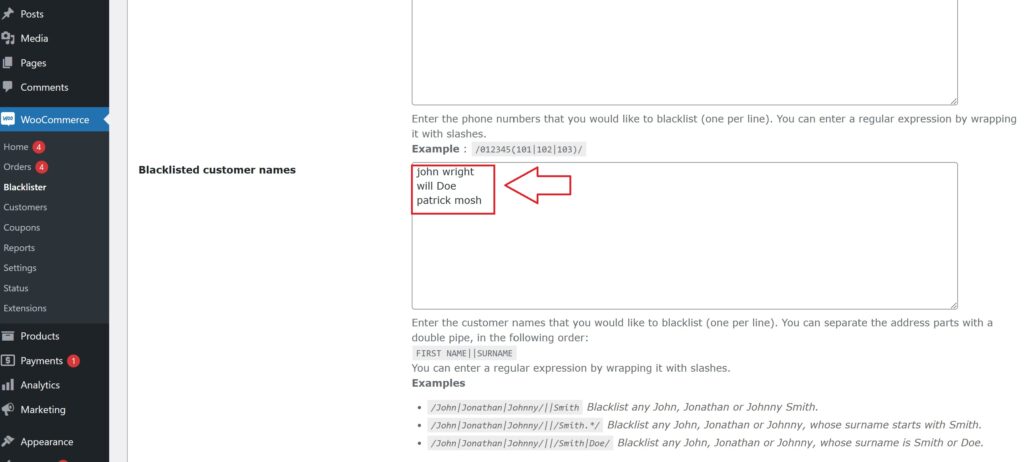
In the settings, you’ll find an option to block customers by their full names. Simply input the names (or surnames) of individuals you want to blacklist. You can block specific first names, last names, or combinations.
Why It’s Important:
Some fraudsters may change their contact details (email, phone number, IP) but continue to use the same name. Blocking names ensures they can’t complete transactions, even if other details are modified.
Steps to Block:
- Go to the “Blacklist Customer ” section in the plugin settings.
- Input the full name that you wish to block.
- Click Save or Update after adding the names.
2. Block by Address (Street, Postcode, City, Province/State, Country)
How to Block:
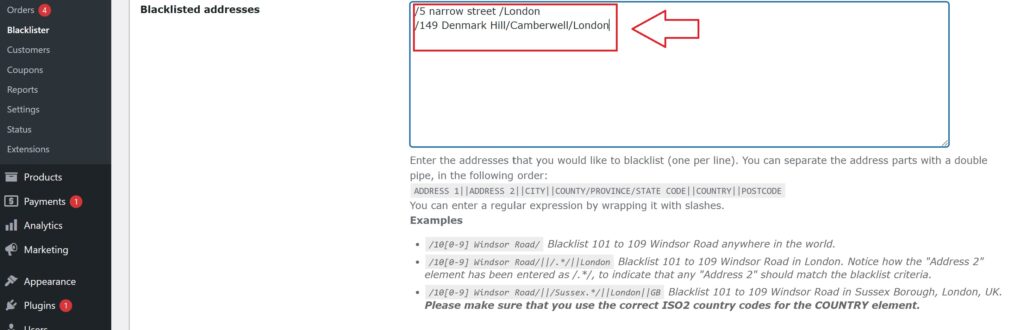
You can block entire addresses, including street, postcode, city, province, and country. This can be helpful for identifying suspicious patterns such as fraudsters using specific fake addresses repeatedly.
Why It’s Important:
Fraudsters sometimes use fake or stolen addresses, especially in regions known for fraudulent activities. Blocking specific addresses helps prevent them from completing purchases using fake information.
Steps to Block:
- In the Address section, enter the full address or parts of it (e.g., postcode, city, etc.) to block.
- You can specify whether to block by street, postal code, or region.
- Click Save after adding the address details.
3. Block by Email Address
How to Block:
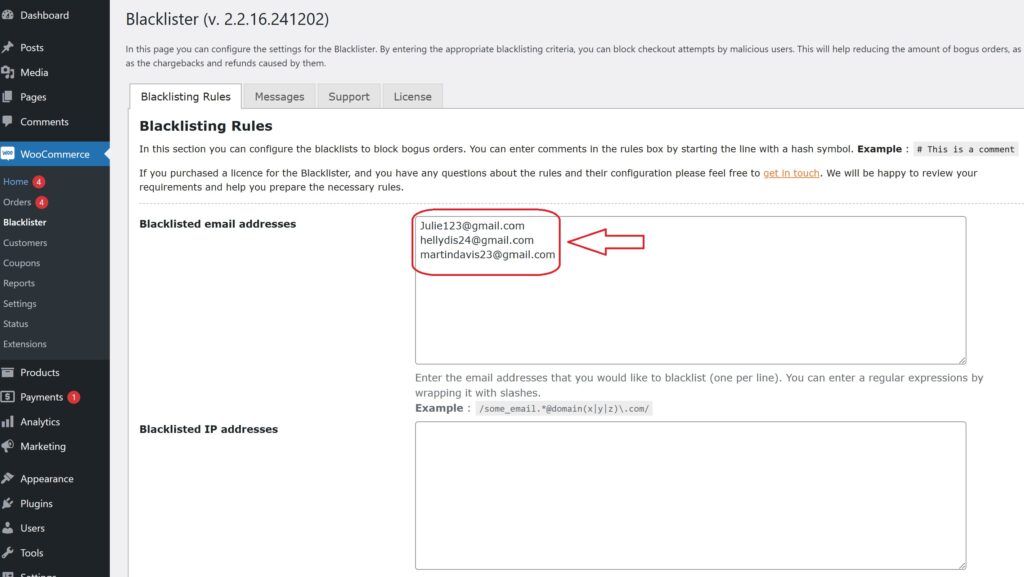
Email addresses are commonly used for fraudulent sign-ups and orders. You can block specific email addresses or even entire domains (e.g., *@fakedomain.com).
Why It’s Important:
Many fraudsters rely on disposable or temporary email services to create fake accounts. Blocking emails prevents them from creating new accounts to abuse your store’s offers.
Steps to Block:
- Under Email Address, input the email or domain you wish to block (e.g., *@disposablemail.com).
- You can block a single email or a full domain (e.g., *@example.com).
- Save the changes to apply the block.
4. Block by Phone Number
How to Block:

Aelia Blacklister lets you block specific phone numbers or even area codes. Fraudsters often use fake or stolen phone numbers to make fraudulent purchases, and blocking them ensures these numbers can’t complete transactions.
Why It’s Important:
Fraudulent transactions can involve stolen phone numbers. Blocking numbers associated with known fraudsters adds an extra layer of protection.
Steps to Block:
- In the Phone Number section, input the phone numbers or area codes you want to block.
- You can block individual numbers or entire area codes if you notice a pattern of fraudulent activity from specific regions.
- Click Save after adding the phone numbers.
5. Block by IP Address
How to Block:
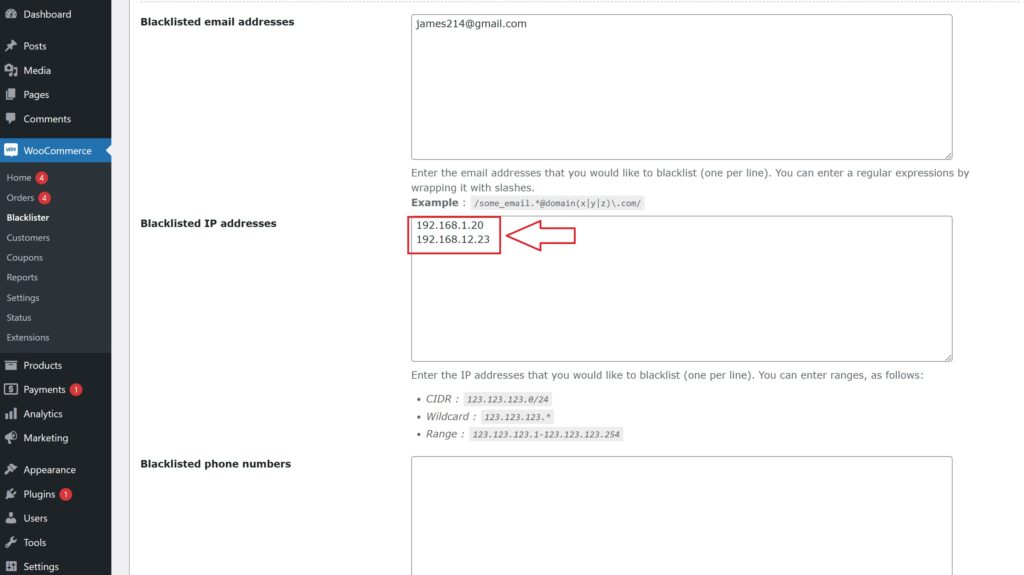
This is one of the most effective ways to stop fraudulent users. You can block specific IP addresses or ranges. Scammers often use the same IP address for multiple fraudulent transactions, so blocking these IPs can prevent repeated abuse.
Why It’s Important:
By blocking an IP address, you can prevent fraudsters from accessing your store from the same network. You can also block entire ranges of IP addresses using wildcards for added protection.
Steps to Block:
- Go to the IP Address section in the settings.
- Input the specific IP addresses you wish to block, or use wildcards to block entire ranges.
- For more advanced protection, you can use regular expressions (regex) to block IP patterns.
- Click Save to activate the IP block.
Final Step: Save and Apply Changes
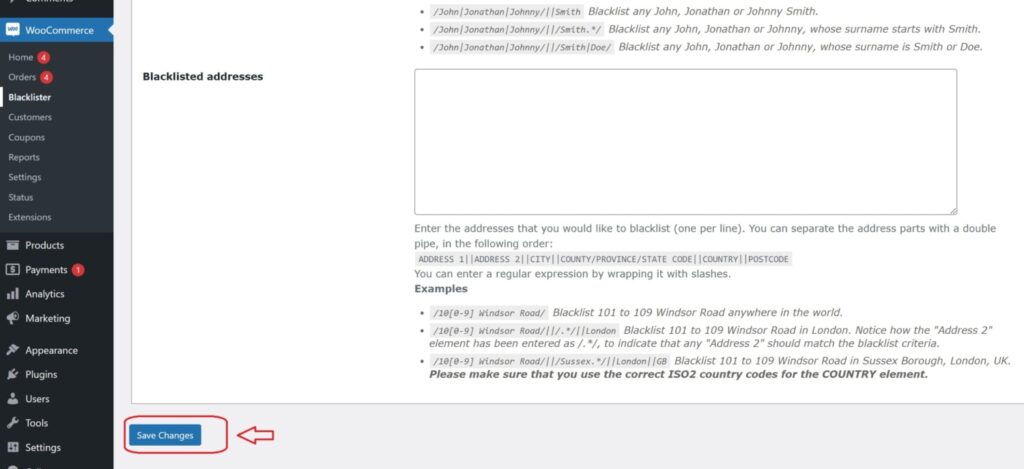
After entering the details for each blocking method, make sure to Save or Update the settings to ensure the changes are applied. It’s important to regularly monitor and update your blacklist to ensure it stays effective against new fraudulent attempts.
More Plugins to Optimize Your WooCommerce Store
WooCommerce Currency Switcher is a powerful plugin that allows your store to display prices and accept payments in multiple currencies, helping improve user experience and boost conversions. Customers can shop in their preferred currency, which reduces credit card conversion fees and makes the checkout process more seamless—ultimately encouraging more sales.
Key Features:
- 🌍 Visitors can select their preferred currency from a simple dropdown widget
- 🔁 Automatic exchange rate updates via Open Exchange Rates, OFX, Turkish Central Bank (more coming soon)
- 🖐️ Option to set exchange rates manually if preferred
- 🛒 Supports checkout and transactions in the selected currency
- 💡 Persistent currency setting – customers’ preferences are saved for future visits
- 🌐 Geolocation-based currency detection for a localized shopping experience
- 🧾 Stores the currency used per order for both customer and admin reference
- 🔄 Allows entering product and coupon prices in multiple currencies
- ✅ Filters payment methods based on the chosen currency
- 🎯 Easy to use for both merchants and customers